Help - Faq
What is a 360° VR picture
A 360° photograph allows to show the entire scene surrounding the observer. VR stands for "Virtual Reality". Cubical photos usually let visitors see also zenith and nadir, giving them the entire spherical view of the environment. A 360° image is normally created by merging the photographs taken in a single or multi-row 360 degree rotation, depending on the lens used and the quality required by the final product.
What is a 360° Virtual Tour
A 360° Virtual tour lets visitors to explore different environments linked to each other or to a map through "hot spots". The environments are often 360° photos or 3D models.
Requirements
In order to view 360° photos, a Plug-in is often required. On this website QuickTime or Flash are needed. If you have not them installed, you can Download QuickTime from Apple or Get Flash from Adobe. Some virtual tours are available for iPad, iPhone and iPod Touch and are developed in HTML and CSS.
How to navigate 360° images
Users can pan horizontally, vertically, and zoom in for a closer look. After the image has loaded, hold down the left mouse button in the centre of the picture and drag the mouse in the desired direction. Zoom in: press Shift key. Zoom out: press Ctrl key.
How to create a 360° photo
Usually you have to join the pictures taken during a single or multiple 360° rotation, depending on the lens used and on the final quality you need. For example, some fish eye lenses let you cover the entire environment with just 2-3 shots, but the quality and the resolution delivered will be rather low. If you use a 35mm lens, instead, you will need to take about 50 shots: 4 rotations at different inclinations, 12 photos for every rotation, one photo pointing at zenith (+90°) and one at nadir (-90°). Summing up: 1 shot at +90°, 12 at +60°, +20°, -20°, -60° and 1 at -90°. That way, you will get much more detail so you can use it to make a 360° picture which will have a so much higher resolution and quality, that they could be printed on large formats. Regarding VR interactive photos and virtual tours, usually you won't need very high resolutions, so you can employ a lens that lets you cover the environment with just 6-8 photos. As a general rule, all shots are to be taken with the same exposure values, in order to avoid that any of the junctions between the photos are visible. Please note that adjacent pictures must be partially superimposable and match, so during both horizontal and vertical rotation, you will take care to reduce potential parallax errors. In order to reduce or eliminate parallax errors, you'll have to take the center of the lens as the center of the rotations, helping yourself with a tripod and a panoramic head, because precision will be very important when you'll try to join the images. The center of the lens is called the entrance pupil, the nodal point or, better, the non parallax point. Let's say that with some lenses, such as fish eye, it's not possible to completely eliminate parallax errors, but a compromise can be reached; in this case the stitching process requires particular settings. Once the photos are all joined ("stitched") together, specific software is needed to export the 360 degree image into different formats: equirectangular, cylindrical and cubic formats are the most common. Now, as usual, you can retouch the photo, clean, remove defects or even make it look better by adjusting colors, levels, etc. Once optimized, the 360° photo can be printed or exported as VR interactive image: QTVR, Flash, Java.
How to find the entrance pupil (non parallax point) location on a lens
Stick a small sheet on a window and place the camera on a panoramic head mounted on a tripod in front of it (around 0.5 metres). Set the camera aperture stopped down (e.g. f/22). Point the camera to a side of the sheet and look outside for a far neat detail. Move the tripod or the sheet in order to have the far detail and the side of the sheet very close to each other. Now, rotate the camera on the panoramic head so that the chosen side of the sheet is close to a side of the frame and take a picture. Then rotate the camera on the panoramic head in order to have the chosen side of the sheet on the other side of the frame and take another picture. If, comparing these two pictures, the distance between the side of the sheet and the far detail is different, then the panoramic head is not properly set and you'll have to change the rail settings. The lower rail has to be adjusted so that the center of the lens mount is aligned with the center of horizontal rotation: this setting depends on the camera and has to be found only once. The upper rail has to be set in order to align the non parallax point with the center of vertical rotation: that depends on the lens/camera combo. It is best to find the upper rail setting first, then the lower setting. Upper rail setting: the side on our sheet has to be the upper or the lower one and the camera has to be rotated only vertically; take the two pictures and compare them; if the distance between the side of the sheet and the far detail is not the same on both, move forth or back the camera on the upper rail, take another couple of upper and lower pictures, until the distance is the same for the two pictures; once found the right setting, write down the index position. Lower rail setting: the side of the sheet has to be the left or the right one; move the camera horizontally repeating the same steps described for the upper rail and write down the finding. That's all. Wanting to use another lens on the same camera? Just change the upper rail position.
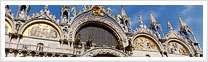
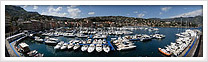
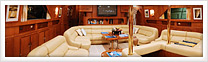
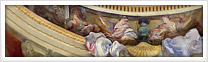
Random 360° Photos